Using Pulsar devices is quite straightforward and intuitive. However, you do need to know a thing or two to make the very best out of them. Today, we’re sharing some of those things that we believe you might find very useful, whether you’re new to Pulsar or have been using our devices for a while now.
Naming
While you can’t judge a book by its cover, you can tell quite a bit about a Pulsar device from its name. And no, not just about the fact that it’s made in Europe (as every Pulsar device is). You can even tell its kind and properties!
These include the type of the device, its generation, sensor resolution and pixel pitch, lens diameter, whether it’s thermal or multispectral and, in some cases, even the device’s NETD.
Curious to find out? Watch the video below.
Zeroing
Use a bench rest. Get heated Pulsar targets or make one from tin foil. Fire the first shot from a closer distance to make sure it’s on paper. Judge from a shot group rather than a single shot – these are a few tips Stefan Orman, a shooting instructor, hunter and our ambassador, shared about zeroing devices. You can find them all by clicking here.
However, if you’d like to learn about zeroing specific devices, we’ve got something more for you. Stefan has also recorded a video of sighting in the Pulsar Thermion Duo. Here, he goes over every step of the process in detail to make sure it is as smooth as possible. The video is waiting for you below.
Now, if Krypton 2 is something you’re after, call our colleague Christin Geuting. We’re kidding, don’t actually call her – just enjoy her video about every single aspect of Krypton 2, including zeroing. Yup, that’s right – you can zero this thermal imaging front attachment for even better accuracy in the field. You guessed it – the video is below.
HD quality
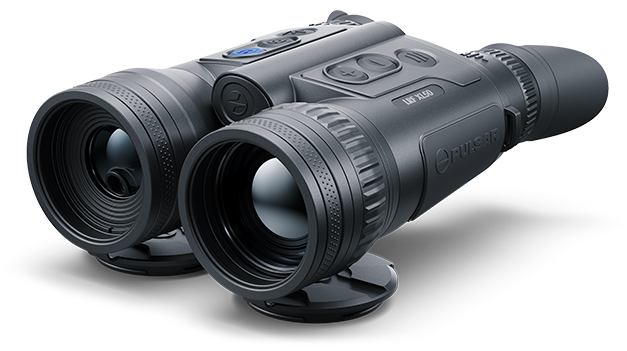
You probably already know that the Pulsar Merger LRF XL50 is our first device with an HD thermal sensor. And also that Merger stands for incredibly convenient binos. But how do you make the best of them? Please bring Laurynas Pranckus, our head of digital marketing, to the stage. We asked him to tell us everything about the HD device and also demonstrate its key functions – now it’s all here for you to enjoy and learn.
The Pulsar Merger LRF XL50 is our first device with an HD thermal sensor.

Ballistics
Ballistic calculations are a fairly new feature that we recently introduced to all Thermion 2 LRF devices. Enabled through the Stream Vision Ballistics app, it displays ballistic calculations and suggested point of aim right on your riflescope’s screen. Pretty impressive, right? Now, while we find it super simple to use, we know that some might find it a tad overwhelming in the beginning. So, Liudas Abišala, our head of marketing and one of the most experienced shooters in our office, has made arguably the most informative how-to video you could imagine. Have a look!
User Mode
Last but not least, it’s User Mode – another feature for you to be aware of if making the best out of thermal imaging is something you’re after. It allows you to save image brightness and contrast to your device’s memory for use any time you need. This way, you can be sure you’ll always get the best image – and get it quickly. This one’s so simple, we don’t really think you need a video explanation, but if you would like to learn more, there’s an article waiting for you if you click here.
With User Mode, you can be sure you’ll always get the best image – and get it quickly.
Before purchasing any night or thermal vision device, please make sure you adhere to the local legislation and only use it when it is allowed. Our ambassadors come from various countries and travel a lot, which allows them to test different devices. We do not encourage or support the illegal use of our devices in any events. If you wish to learn more about export and sales restriction policy, please visit the following link: Export and Sales Restriction Policy.